Before day one
Day one: project and team
Create the project, invite your production office with the right roles, and start the credits list in the Data tab while every name is still fresh.
The video loads from YouTube when you press play. Watch it on YouTube.
The credits are months away on the first day of pre-production, and that’s the best moment to start them. Create the project, bring in your production office, and jot down each person as they sign: a department, a role, a name. By the time you reach post, the list is already there and already checked.
Before you start
- You need an EndCreditsPro account and to belong to an organization. Whoever creates a project becomes its owner, with the Admin role.
- Only an Admin of the project can add team members and change their roles.
- To write in the Data tab you need to be an Admin or an Editor.
Steps
1. Create the project
- In Projects, click New project.
- Type the Project name.
- Choose the Type: Film (one work) or Series / Shows (several works organized in seasons and episodes). The type is set here and can’t be changed later; for a series, see Credits for a TV series.
- Click Create new project.
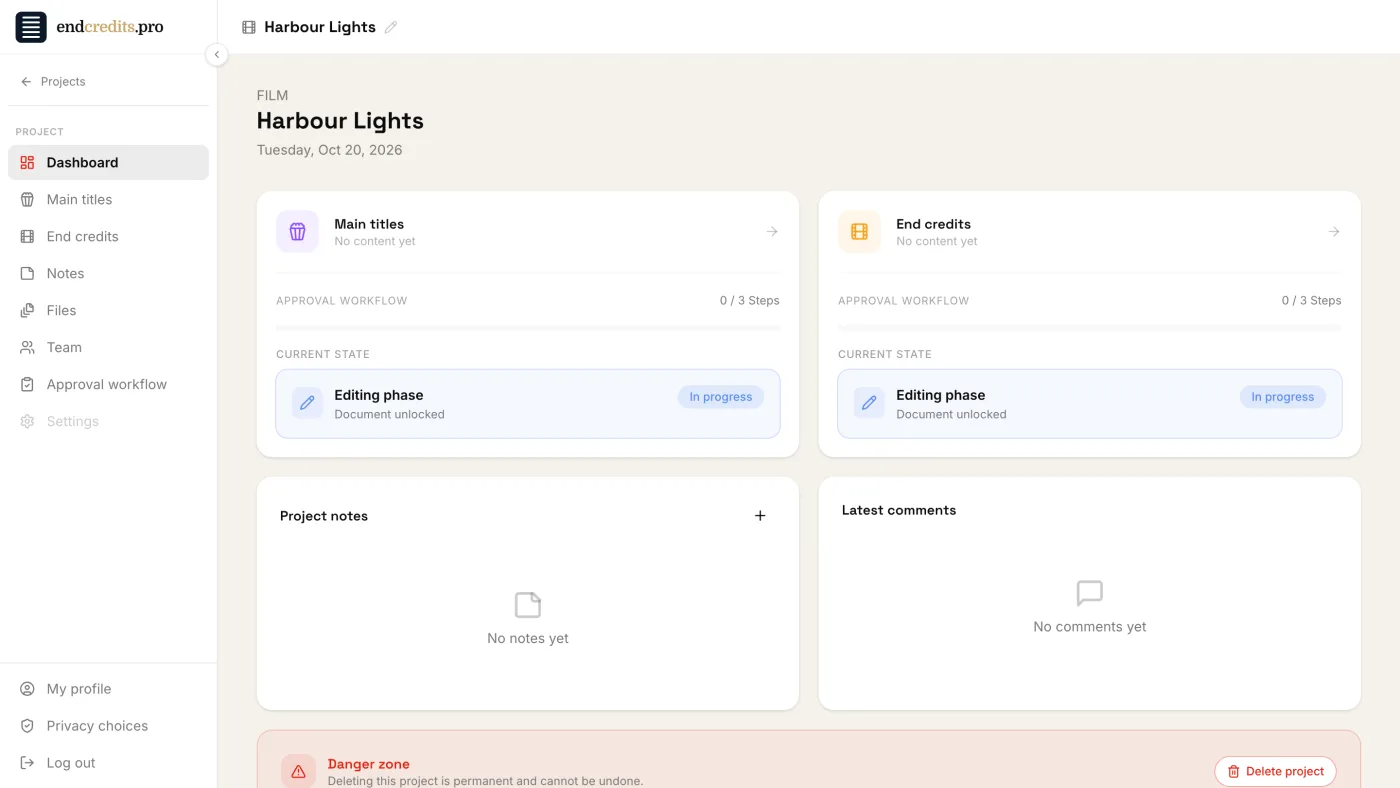
A film opens on its Dashboard, with one card for the Main titles and one for the End credits. Every project has both, each with its own list, composition and approval workflow; there’s nothing to choose.
2. Bring in your production office
People join a project from your organization, so a colleague who isn’t in it yet needs an invitation first: an organization admin sends it from Members with Invite new member. Then, in the project:
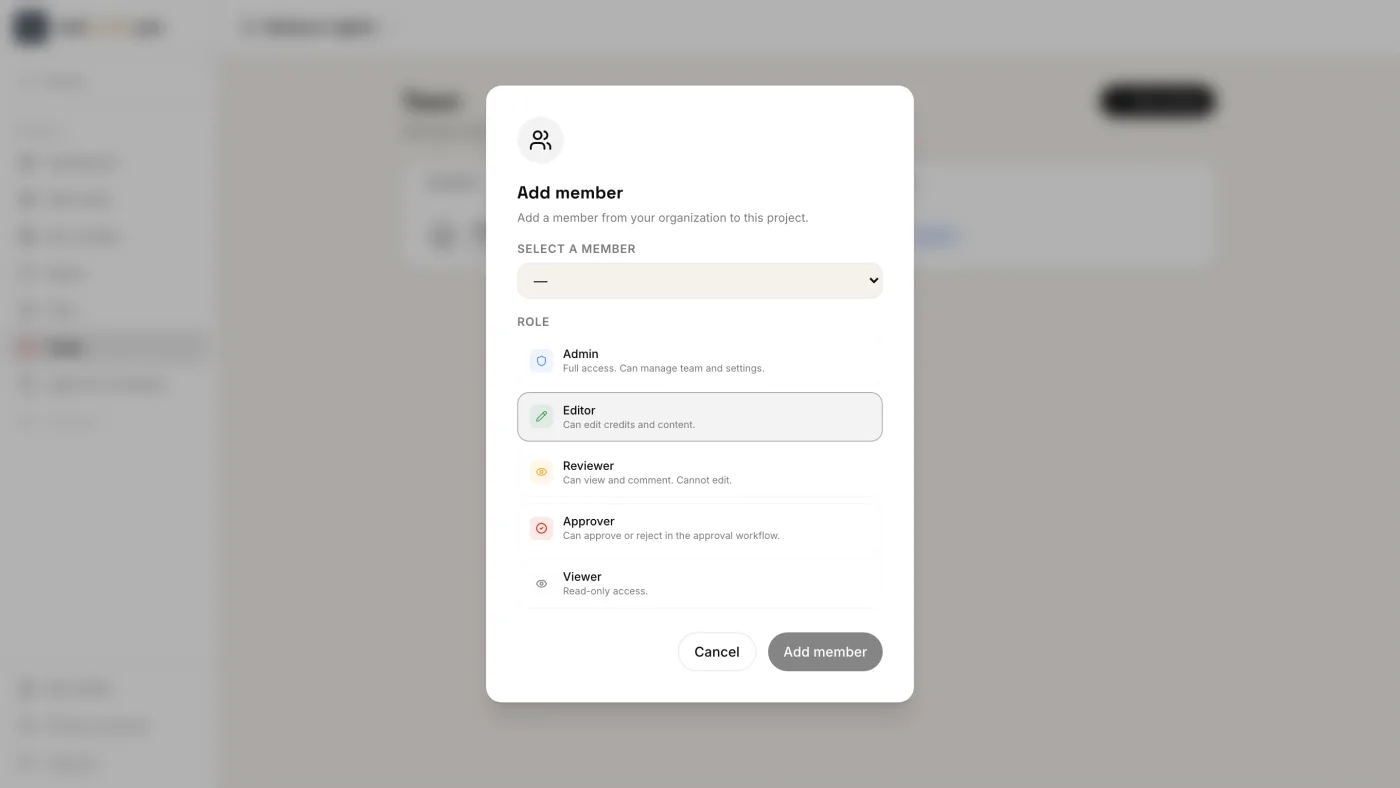
- Open Team in the project’s sidebar and click Add member.
- Select a member from your organization.
- Choose their Role and click Add member.
| Role | What it can do |
|---|---|
| Admin | Full access. Can manage team and settings. |
| Editor | Can edit credits and content. |
| Reviewer | Can view and comment. Cannot edit. |
| Approver | Can approve or reject in the approval workflow. |
| Viewer | Read-only access. |
You can change a role later from the role badge on the Team page, or remove someone with the bin icon. The owner’s role can’t be changed. More detail in Roles and permissions.
3. Start the list in the Data tab
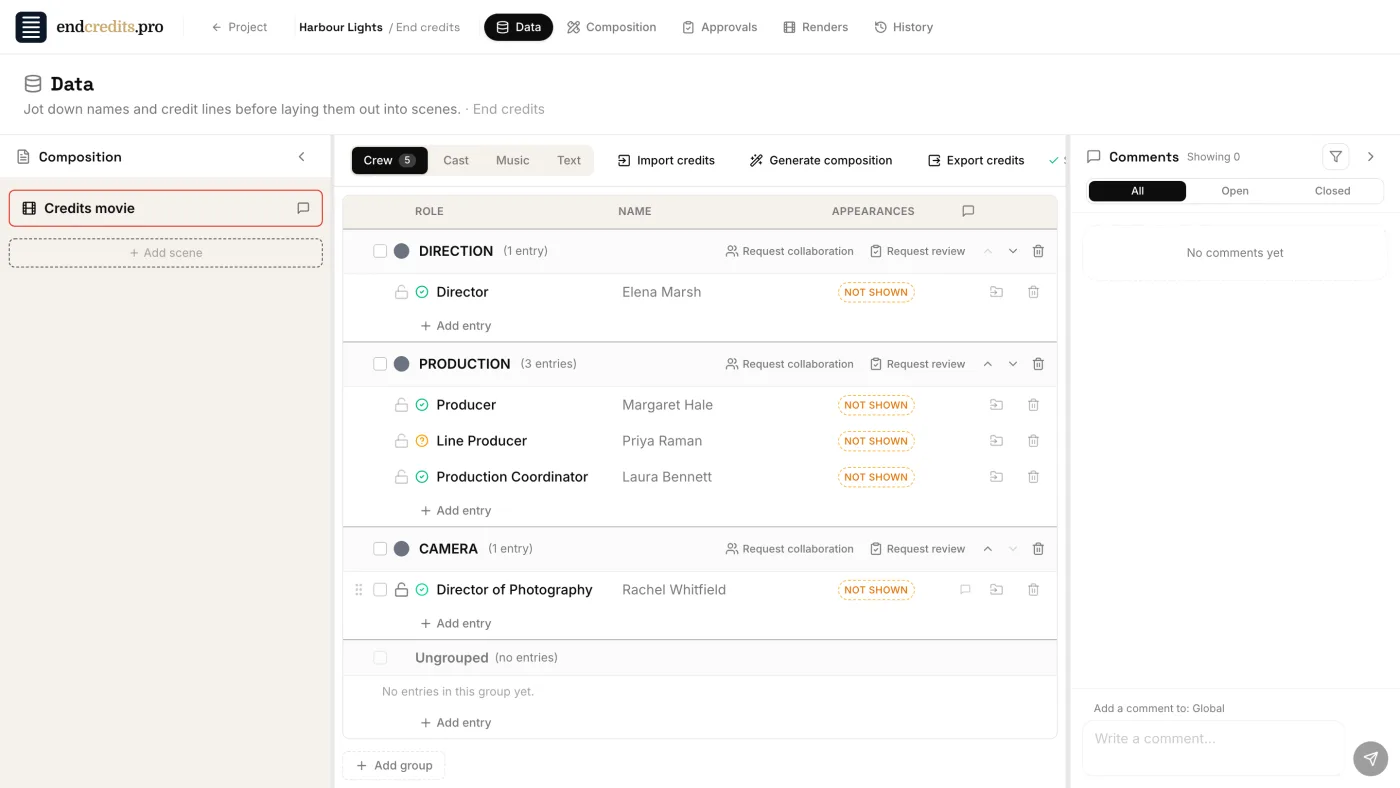
Open End credits (or Main titles) from the Dashboard or the sidebar: the credits open on the Data tab. It has four tabs, Crew, Cast, Music and Text, and inside each, your groups.
- Click Add group and name it after the department, for example DIRECTION.
- In the group, click Add entry and type the role, for example Director.
- Type the name next to it. For a role shared by several people, click Add name to add another name under the same line.
On the Cast tab the columns are Character and Actor, on Music Track and Artist. Lines that are in no group go to Ungrouped at the bottom.
4. Mark each name as verified
Every new line starts as To review, with an amber question mark. When the name is confirmed (the contract is signed, the spelling checked), click the icon: Mark as verified? explains that it records who verified it and when. Click Mark verified and the icon turns into a green check; hover it to see Verified by you and the date. Clicking the green check sets the line back to To review.
5. Keep it right
- An edit sends it back to review. If anyone changes the role or a name of a verified line, it goes back to To review, so a verified credit always means the current text was checked.
- Lock what is final. The padlock at the start of a line makes its role and names read-only (“Lock — makes the name read-only”). Click it again to unlock and edit. A locked line can still be moved, verified or deleted.
Week by week, the list grows while every detail is still fresh. When post starts, you’ll lay these same entries out in the Composition.
Related pages
- Key concepts Data, Composition and Design: every name lives in one place, through the whole lifecycle.
- Roles and permissions What admins, editors, approvers, reviewers and viewers can do.
- Import your crew lists Bring an Excel, CSV or Word file, or paste text: names are sorted by department.
- Let the departments fill it in Send each head of department a private link to add their own crew.
Try it on your own production
EndCreditsPro is free during the beta. Credits from day one.
Last updated October 22, 2026.